Tuesday, 26 November 2013

Rolled Veal


 In France and more so in Normandy, autumn is the season of "plats mitonnés" (slow cooked dishes) and veal is just perfect for that.  Although, this dish is not much to look at, it is so very tasty!   With it, serve a generous portion of potato or celery root mash and you will be in heaven!   Today, I roasted the meat on a bed of carrot julienne, which brought a very light sweet taste to the meat.

So here is my recipe :

500g/1 lb fillet of veal (or any lean cuts - works with other meats if you prefer)
1 cup of breadcrumbs mixed with some parsley (I whizzed up some day old bread in the blender, added in some parsley at the end and baked in the oven for 10-15 minutes. The texture is coarser and if you use good bread, it goes without saying it will taste more special!)
4 to 6 slices of smoked dried ham
3 shallots, diced
salt and pepper
240 ml/ 1 cup vegetable stock
vegetables to roast on (here I used three carrots)

Slice your meat into about 6 to 8 slices.
Hammer out the meet flat (see photo) with a meat hammer or a rolling pin (use clingfilm if using a rolling pin)


Sprinkle on some of the bread crumbs (keep 1/4 back for the topping), a little of the shallots and finally some of the diced up (or torn up) smoked ham. Roll firmly and secure with a toothpick if needed. Place the meat on the julienne of carrots, sprinkle on the bread crumbs and drizzle with olive oil. Pour in the vegetable stock (a splash of white wine would be also good!)  


Bake for 45 minutes at 170°c/ 325°f if you are using veal fillet 
(bake longer - 1 hour 15+,  if using a tougher cut of meat and if the rolls come out bigger.  You may wish to add some water if it dries out)
Take out of the oven and let stand 10 minutes to rest, cover with foil.

I will be catching on all your blogs over the next week.  Meanwhile, keep well and happy!


Monday, 18 November 2013

I'm Back!


So, it's me! Back again, what a roller coaster! I have seen a few too many hospital interiors of late, but and mostly, I am now mended and have glued my fingers crossed for good luck! So, on with the show!

I have been cooking along the way and have many new ideas for you, I shall post something later this week.


                                                     Double rainbow for luck!


Aston my pug is doing fine!!


Thursday, 18 April 2013

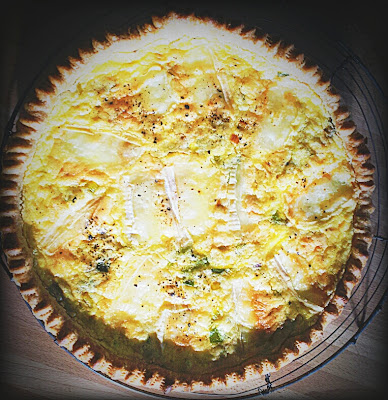
Leek and Pont-l'Évêque tart...


Pont-l'Évêque is a soft cows' milk cheese being first made around the 12th Century, probably the oldest Normandy cheese still in production today, If you haven't tried it, it is something like a Brie or Camembert. It comes in three sizes which is quite practical.


Leeks from our garden...

                           
Pastry of your choice for the base. 
(Mine being 300g (1 1/2 cup) flour, 170g (3/4 cup) butter, egg yolk and ice water to bind)

For the filling :

2 leeks, trimmed of the dark green parts and washed thoroughly, finely chopped
120 ml (1/2 cup) cream
120 ml (1/2 cup)  milk
4 eggs
170 g  (6 oz) cheese (Pont - l'Évêque, or Camembert or Brie) you may want to add more cheese!

Roll out the pastry, trim and chill.  Bake the base blind (with pastry weights or dried beans on baking paper)  at 200°c / 400°f for 20 minutes;  remove the weights and return for another 5 minutes or until brown as this will not colour any more in the second part of the cooking as we are just setting the eggs.

Cook the chopped leeks for about 5 minutes in a little olive oil, just to soften them.

Mix the cream and milk with the eggs. You could use just cream or milk also if you have a bigger mold, then you can add more custard mixture  (1 egg to 60 ml / 1/4 cup of milk or cream).

Place the leeks into the eggs and cream, season well with salt and black pepper. Pour the mixture in your base and place the sliced cheese in at an angle. You can eat the rind but you may prefer to remove it.

Bake for a further 35/40 minutes until set at 140°c/ 285°f

Eat preferably warm if you like oozing warm cheese!!

You could add 'extras' to this, but I really like the simplicity of this tart without the addition of meat or herbs. If you can't get the cheeses above then a strong flavoured hard cheese (grated) would be a very good alternative.


Wednesday, 10 April 2013

Sumac Roasted Chicken and Couscous.


Sumac is a berry that adds a romantic exotic lemony note to your cuisine.  I first tasted it nearly twenty years ago at our Persian friend's house in his famous rice dish that has a base of crispy potatoes and fluffy rice on top with sumac berries - A dish I did not dare make as I only wanted to eat it there!  Sumac is now more readily available (my French supermarket stocks it!) or ethnic food stores will have it.


You could use a whole chicken or pieces; oil lightly the chicken and rub in the ground sumac.  I then roasted my chicken slowly on a high heat to start (for about twenty minutes), then finishing it for a good hour (or more depending on the size) on a lower setting.  I roasted the tomatoes and preserved little lemons at the same time; they then go into the couscous at the end.

For the couscous, mix one cup/250 ml of grain to two cups/500ml of water or stock (for two servings).
 In a pan, simply add a few tablespoons of olive oil to the grains and make sure it is well mixed in. Pour in the water, season (also you can add a tablespoon of sumac) if not using stock and onto the heat, bring to the boil (add a knob of butter) and put the lid on -  continue to cook for thirty seconds and cut the heat, not lifting the lid for ten minutes.  Using the fork, just fluff up the grains to break the lumps. Mix in the warmed tomatoes and sliced lemons (or other warm pre cooked chopped vegetables work wonderfully) and serve!

Wednesday, 3 April 2013

Gnocchi of butternut squash.


I have made gnocchi previously HERE (click!) so this is the same process, but different ingredients.  It is similar in that it is delicate to work with.  I prefer to just roll these ones into sausage shapes and cut, without the usual fork indentation on the back, but go a head if you wish to.

500 g / 1 lb butternut squash (about a half)
3 egg yolks
75 g/  1/2 cup flour
125 g / 1/2 cup ricotta cheese
50 g /  1/2 cup parmesan cheese
salt and black pepper

Some olive oil (about three tablespoons) and a tablespoon of butter to finish.


Peel and dice the butternut squash, cook in a non-stick pan over a low heat with just a tiny amount of olive oil.  Cook until soft around twenty plus minutes.  You can choose to mash the butternut squash with a fork (as I like, it has more texture this way) or purée it in a blender. Put back in the pan and cook away any moisture - for say, another 5 minutes, the dryer the better. Leave to cool completely.
 Once cooled, add in the egg yolks and stir well.  Fold in the two cheeses, then the flour and seasoning (adding a little more flour if too soft). Don't over stir at this stage. On a floured surface, roll out into thin sausage shapes and cut (see the link above for this stage). 
Poach in salted boiling water in batches and once they float, count to 10 and transfer to a wide frying pan (skillet) with the olive oil and butter.  Keep on a low heat while you cook another batch.  You can turn the gnocchi over gently as they will fry and have a little crunch to them.  Serve with some fresh herbs of your choice : I used coriander leaves (cilantro) and some more black pepper.


Thursday, 28 March 2013

'Oeuf cocotte' with blue cheese cream...


Baked eggs with a blue cheese cream.  A quick and delicious recipe for egg lovers for Easter...that needs only a few ingredients!!!  It makes a wonderful lunch or starter.  You can make it many ways, my favourite along with the blue cheese are foie gras cream or a cèpe cream.  You could do a simple cream with fresh herbs or even smoked fish - endless combinations!

For 4 persons, you will need :

4 really fresh eggs
250 ml (1 cup) of cream of your choice (less/more if your ramequins are small/big)
4 tablespoons (or more!!) of blue cheese (or parmesan cheese if you don't like blue cheese)
a little grated nutmeg
salt an pepper

Grease four ramequins with a little butter.
Set the oven 200°c/400 °f.
Slowly heat the cream in a pan and melt the cheese in it.
Season to taste (some blue cheeses can be very salty) and grate in the nutmeg.
Fill each ramequin with two tablespoon of the sauce.
Break your eggs separately in a small bowl (to make sure there is no shell)
and delicately slide the eggs into the ramequins,  cover the eggs with the remaining sauce.
Pop in the oven between 8 to 12 minutes - depending on the size of your ramequins and how you like your eggs to be cooked. (The sauce, being hot, speeds the process up, but if using cold cream add another five minutes).

Serve immediately with lots of crusty bread!!!

*   *   *   *   *

WISHING EVERYBODY A VERY HAPPY EASTER ...

Sunday, 24 March 2013

Dark Chocolate Cake...

...With home-made black cherry jam.

185 g /  6 1/2 oz  dark chocolate (70%)
(PLUS 85 g / 3 oz  if you want to add the bands of chocolate or drizzle some over the top)
150 g / 2/3 cup of butter
170 g / 1 and 1/3 cups flour
140 g / 1 cup sugar
3 eggs
1/2 teaspoon of baking powder
80 g / 1/2 cup of chocolate chips

Filling : Jam of your choice  (black cherry or raspberry are both good) 

Melt the butter in a pan, remove from the heat and put in the cut up chocolate (185 g).  Stir in to make sure it has melted entirely.
Whisk the eggs and sugar until the mixture is pale and has doubled in size.
Pour the chocolate into the eggs and sugar mix. Add in the flour and baking powder by folding it in gently, taking care to not over mix the batter.
Pour into a buttered and baking parchment/paper lined spring form cake tin
 (about 15.25 cm by 7.6 cms  - 6 inch by 3 inches mine is American)
Bake for about 80 minutes at 160°c / 325°f testing with a cocktail stick that it is cooked. The times will differ if your cake tin is bigger.

Remove from the oven, (this cake is wonderful warm, but you can not decorate it that way!!) and leave to cool for a few hours.
 Once cooled, I carefully cut into three layers (two is fine also). Put the jam on both surfaces and put the layers back together. You can decorate by drizzling some melted chocolate on top with a spoon or a fork.
 I use some acetate strips cut to size (see below, good baking shops sell rolls of the acetate). Pour some melted chocolate on and smooth over with a palate knife.  Wrap the strip around the cake.  Start with the upper part of the cake first.  You can put it into the freezer for five minutes to set, remove the acetate and then proceed with the next strip. I painted some chocolate on the top and sprinkled some rock sugar on. You could make a lip at the top and fill it with fruit i.e. fresh raspberries.


Thursday, 21 March 2013

Grilled chicken with preserved lemons and slow cooked onions


Continuing with the grilling phase (now in the rain!). This is a quick dish, which is really about the slow cooked onions with the added zing of preserved lemons. These lemons are easily obtainable in France and are used in many Moroccan dishes, but you can also make them yourself.  The lemons are preserved in salt so they have a tart salty taste to them.

For this recipe for 4, you need :

Free range chicken (whole or pieces)
6  onions
4 small preserved lemons

Prepare the chicken - be it a whole one to roast or as I did, chicken breasts grilled and split in two, filled with a tablespoon of the cooked down onions and lemon mix (like a chutney, really).

After slicing the onions finely, cook them on a low heat with a little olive oil in a frying pan. Cook for about 15 -20 minutes. Remove the pips from the lemons are finely sliced them also. Put the lemon slices in with the onions about halfway through the cooking.

Another way would be to add chopped up precooked chicken (leftovers!) to the pan at the end of the cooking of the onions and lemons, a little stock could also be added.

*    *    *
Spring window boxes planted up...


Monday, 18 March 2013

Grilled Belgian Endives...


This is really a recipe for better weather, but we decided to have a barbecue this weekend, regardless of the lack of heat or sun!!  Grilling the endives on the barbecue adds a smoky taste and the honey marinade takes the bitterness away.  These grilled endives accompanied a succulent "côte de boeuf" (rib of beef) and a mix leaf salad - a delicious combination!
This dish can also be prepared in the oven or in a griddle pan, but you must put the olive oil at the beginning and the honey 5 -10 minutes before the end, so it will not burn.

To serve 4 persons :

60 ml / 1/4 cup olive oil 
heaped tablespoon of honey 
salt and white pepper to taste

Heat in a small pan to melt the honey if the honey is not very liquid.

8 endives split in two, lengthways

Place the endives (the cut side up) on to the hot barbecue.
Lightly brush a small amount of the marinade onto the endives (using a silicon brush).
Cook for 3  minutes.
Turn the endives over and brush again with a small quantity of the marinade.
After 4 minutes, turn them over again and brush some more marinade on the endives and carry on cooking for another 4 minutes (they should be just cooked through, soft with a bite to them - you may choose to cook them slightly longer).
Serve and "bon appétit"!

These endives can also be served cold in a salad and taste really fantastic!

Thursday, 14 March 2013

Cod stuffed with smoked salmon...


This fish dish is really delicious!  Hot smoked salmon can be a real treat and the combination of both fish really goes well together. The salmon in the middle is protected, as lightly cooked is the way to go!

I cut the fish into portions and then cut a pocket into the middle of the fillet.  Then, I push the thick salmon fillet (also cut to size) into the middle - if you have fine slices of smoked salmon, you can roll them up (one or more!) and put it in.  If  you choose another fish or if the fillet is thin, you could fold the fish over and put in a tooth pick to hold it together.

Cooking time will depend on how thick it is, but take into account the fact that the smoke salmon needs to be 'just' cooked.  As soon as the cod has changed colour (from opaque to white), cook for a few more minutes, then get it out and let to rest for a minute or so with an aluminium/tinfoil cover on it.

This sized portion of fish, took 11 minutes at 180°c / 350° f,  for four portions with a 2 minute resting time.  I made a very light creamed parsley sauce (no flour, just reduced to thicken slightly), steamed rice with lemon zest and steamed broccoli.


Monday, 11 March 2013

Vegetarian Tibetan Momos..


Today is my big brother's fiftieth birthday and this is a vegetarian recipe for him. In a recent conversation, he was telling  me of the wonderful vegetable Momos he had in a Tibetan restaurant in Brighton  (his blog is HERE (Auty and the Angel...) , so I thought I would try to recreate them. I have never made these dumplings before, so there is room for improvement with the shapes but I shall be sending some over to him via our parents for him to enjoy with my love.... Happy Birthday Paul!


Yes... I made the dough and it was really not too difficult but wonton wrappers could be used.

225 g / 1 and 1/2 cups of flour
1 teaspoon of salt
1 teaspoon of baking powder
100 ml / bit less than a 1/2 cup of water

Mix into a dough, let rest in the fridge for half an hour then divide into 24 balls and roll out thinly. I found it best to start them off small and go back to them, rolling out bigger as they relax a bit.

Plenty of flour!

The stuffing 
- these ones I made are for vegetarians, but you can easily make a meat stuffing of your choice :

2 red onions finely sliced
1 leek cut finely
1/8 red cabbage grated
1 small courgette/zucchini (remove the middle seeds and dice)
12 fine green beans chopped finely
1 carrot - using a veg peeler I made ribbons
2 garlic cloves
grating of ginger (thumbs worth!)
3 tablespoons light soya sauce
2 tablespoons rice vinegar
coriander leaves and stalks (1/2 bunch) chop finely
chilli powder - just a dusting

I just cooked all this up in a wok, starting with the onions so they caramelise first, adding in the vegetables for only a few minutes so just cooked. Finish with the rice vinegar to deglaze the pan and let it reduce, then add the soya sauce (this is the salt so don't add any) and let this all cool down before putting in the wrappers.


There are the round ones at the top or the half moon one above; you have to wet the edges that are to be folded against each other with a tiny bit of water. It is just a question of folding and pleating - I hope the photographs show you how I did it - but pinching and folding was about it (a small brush for the water was handy for the bits I missed).

Steam in a 'steamer' pan on few lettuce leaves for about 7 to 8 minutes...and serve with a chilli jam or dipping sauce of your choice!


Saturday, 9 March 2013

Apple crunch!


This little filo pastry parcel is some thing I make when I want a small, but not overly sweet dessert. The apples and golden raisins (currants or sultanas work also) are poached in honey and spice for a few minutes. 

For four rolls :

2 apples (I like to use a Granny Smith - an acidic apple but any will work)
80 g/ 1/2 cup of golden raisins - soaked  for a few hours in a 4 tablespoons of Calvados, brandy or fruit juice (or as I do a mix. Also you can use any dried fruits of choice - fig is good also)
1 tablespoon of honey + 1 tablespoon of butter
1/2 teaspoon of cinnamon
1/4 teaspoon of ground cloves
4 sheets of filo
4 teaspoons of brown sugar (more if wanted)
extra olive oil or butter to cover the filo pastry
*

Peel, core and cut the apples (1/4 the apples and cut into six). I soak the fruit for a few hours if I have time, so it is soft. Put the tablespoon honey and another of butter with any soaking liquid, 3 tablespoons worth (or water) in a small pan and mix in the apples, the soaked fruits and spices (experiment with these as lots of other spices work also:  ginger, fennel seed, cardamom seeds etc.). Put on a low heat (you could flame the alcohol off, but be careful of the flames jumping up!).  Cook this for about 3 minutes just to infuse and stop the apples oxidising. Put this to one side to cool, but I like to keep turning the fruit to take on the spice taste. 
The filo must be kept covered to stop it drying. Take one sheet and 'paint' it with melted butter or as I like to use olive oil, place the cooled fruit (1/4 of the mix) at on end in the middle. Sprinkle a teaspoon of brown sugar over the whole sheet evenly and fold a third over (as below) and the other side the same way. 


 Paint a little more butter or oil and roll up firmly as below.

Bake for about 12 -14 minutes in an oven of 180° c  /  350° f  until it is golden the butter will colour quicker so keep watching!!  I like to serve them warm.  If you want a bigger dessert, they go very well with ice cream or an apple sorbet... 
*
I was so happy to see the first tree in blossom this week, when I was in the city of Caen, Thursday afternoon.  I am smiling every year when I see the first tree exploding with flowers... as my spring is here (almost!!)


Cooking to, amongst other songs ...
 'Landscape with figure (1922)' by Max Richter from the Memoryhouse album.

Saturday, 2 March 2013

A Winter Salad...


With all the root vegetables in full flow at the market today, I fancied a raw crispy salad to taste them. Admittedly, mine are cut, razor thin, on a mandolin but you could grate/microplane/machine chop the vegetables or even use a potato peeler to make ribbons. I rather like the mix here, but make it your own with things you like. I also provide two sauce to choose from.

2 carrots
1 parsnip
 red cabbage (a wedge - about 1/8th)
1 apple
1 cucumber
1 small black radish (daikon) 
1 fennel bulb
2 celery stalks

Just slice thinly and/or grate.  Mix well and then dress with either the following:

Herbed Greek yoghurt dressing
240 ml /1 cup Greek yoghurt
2 tablespoons of dried dill (3 if you can fin fresh)
1 tablespoon of chopped chives (dried if you can not get fresh)
1/2 lemon (the juice of... more if a lemon lover!)
1 chopped shallot (1/2 red onion)
season - black pepper and salt

Mix and let stand an hour (minimum).

Lime dressing
125 ml / 1/2 cup olive oil
1 Lime (juice and some of the zest)
1 tablespoon of Dijon mustard
(small bunch of fresh coriander/cilantro if wanted)
season - white pepper and salt

Mix the mustard and lime juice. Whisk in the oil slowly, add the herbs, season and serve.

Monday, 25 February 2013

Beef braised in Guinness with whole wheat Pasta...


Apologies... I have been down with a bad flu. I don't think I have ever slept so much!  I am feeling a bit better today. A big thank you to my new 'joiners', very pleased you are here - so, on with the show...

Now, if the Guinness (or any dark beer) bit, is putting you off...  please try it, it really adds a depth of 'velvet' which goes so well with this. The next bit is the cut of meat : I always use the 'Hampe' in French or skirt steak (a long and flat piece of beef with long fibres of meat and a slight marbling of fat, that has great texture and taste).

For 4 :
700 g (1.5 lbs) skirt steak (or beef cut of choice - ground beef if you are in a hurry!)
330 ml (12 fl oz) can of Guinness
40 g (3 tablespoons) tomato purée
4 shallots (or 2 red onions)
2 finely grated carrots
1 litre (4 cups) of stock


Cut the long strip of meat into manageable sections (15 cm / 6 inches).   Then, for each one of these, you want to cut across (as in, across the grain) quite thinly - the meat will then be in strips, but will fall apart once cooked (see below). Chop the shallots.
In to a big pot, put some olive oil and brown the meat on a high heat; once just coloured, add in the shallots or onions and stir for a further four minutes reducing the heat, put in the tomato purée and cook for a minute; pour in the Guinness and cook for five minutes. Add in the carrots and stock, bring back to the boil and simmer for  around an hour and forty-five minutes (depending on the thickness of the cut beef, but the strips should be falling apart! - topping up with water if it gets too low)

Adding the Pasta should be done just before serving, as the beef can be cooked ahead of time.

I used a whole wheat pasta (Pennette Rigate) that I put straight into the same pot (enough for four) and let it take the juices of the meat (rather than precooking in water) - by cooking it this way, you will need to cook it a tiny bit longer as the juices are thicker so they take longer to rehydrate the pasta. I actually cooked as indicated on the packet, but let it stand for about six minutes off the heat with lid firmly on - if not about two or three minutes more (making sure the is enough liquid, add boiling water if it is drying out too quickly. Test before serving!)


Friday, 15 February 2013

The birthday lunch...


 We were  lucky enough to celebrate 'the' special birthday up the Eiffel Tower at the "Jules Verne" restaurant  located on the second floor of the tower (125 meters or 375 feet from the ground) - it was truly special!


Special breads, imaginative verrines, tasty and beautiful dishes followed by heavenly deserts -
all served with the Alain Ducasse style!


And.... vintage champagne followed by a velvety red wine to accompany the ultimate views of Paris!

Sunday, 10 February 2013

Paris by night...


A view from the flooding Seine River from the Arcole Bridge bult in 1854 made of pure iron
 and from where the liberating allies arrived to free the Paris City Hall in 1944.


The dome of the French Academy and the famous Eiffel Tower!


A view of the Pont Neuf from the Pont des Arts!


Here it is : Notre Dame cathedral celbrating its 850th birhtday!
The nine new bells just arrived! (more another post!!)


 Metro signs in the "Art Nouveau" style by Hector Guimard!


View from the Pont au Change of the Pont Neuf (which is the oldest bridge of Paris finished in 1607).

We are having a really wonderful time with the family.  We are also enjoying the food and liquid bubbly refreshments Paris is so good at providing...

Friday, 8 February 2013

Paris by day...


Place des Victoires in the 2nd arrondissement.
Note that in the language of equestrian monuments,
 the position of the horse's legs is supposed to reveal how the cavalier died.
Two front legs up : the cavalier died on the battlefield (here not true as Louis XIV died naturally) ;
Front right leg up : the cavalier was murdered ;
Front left leg up : the cavalier died of his wounds ;
No legs up : the cavalier died naturally.


The famous Opéra house, where the legendary phantom is still busy haunting!

Two beautiful buildings adjacent to one another in the Haussmann style, near Place des Victoires!
In Paris, the first and second floors were considered to be the "noble floors"
 with higher ceilings and balconies!


The Vivienne Gallery built in 1823!
Abandoned after the second Empire, it has been revived by
the fashion designer Jean-Paul Gaultier!


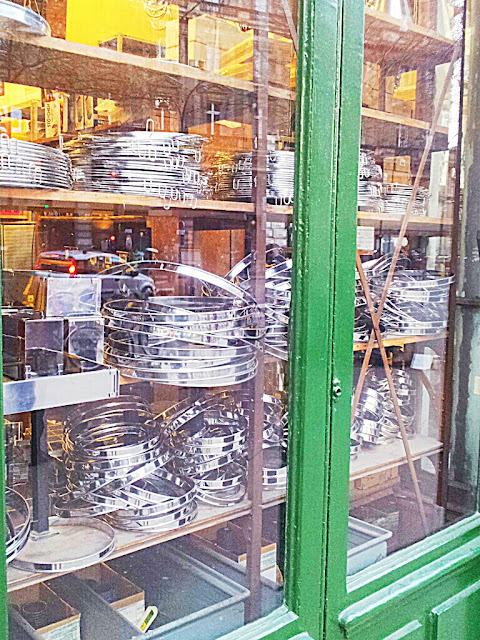
One of my favourite kitchen supply shop in Paris : Dulherin ...!


The oldest pastry shop in Paris : Stohrer!
Opened in 1730 by the pastry chef of the King of Poland whose daughter, Princess Maria Leszczynska
got married to Louis XV!


Many pastries made all over France were created here (this bit is the savoury section - my personal favourite!)


Related Posts Plugin for WordPress, Blogger...